How To Hike Vernal And Nevada Falls In Yosemite National Park (Mist Trail)
By Jessie Festa. This guide to hiking the Mist Trail to Nevada Falls contains affiliate links to trusted partners!
Looking to hike Vernal and Nevada Falls in Yosemite National Park?
Then you’re in the right place!
This trek, which is also known as the Mist Trail, is one of the park’s most popular — and for good reason.
Not only do you see two stunning waterfalls and then climb to the top of them, but you also take in some of the most jaw-dropping views in all of Yosemite.
Yes, it’s hard, but if you’re up for the challenge you will be rewarded with an absolutely epic hike that will likely become one of your favorite of all time.
We’ll go over more reasons to add this trail to your Yosemite itinerary below — with photos!
Quick tip: Need help planning your national park trip? Fellow blogger and outdoor adventure expert Alex on the Map offers custom national park trip itinerary planning. Click here to learn more about her services!
What Type Of Hiker Are You? [Free Quiz]
But first, before we dive into how to hike Vernal and Nevada Falls via the Mist Trail, I want to share a free personality quiz I think you’ll love:
Discover your hiking persona in this fun and short hiker personality quiz, which also shares trail suggestions based on your results.
Once you’ve grabbed the quiz, let’s discuss how to do the Mist Trail to Nevada Falls, one of my favorite California travel experiences. This is truly one of the best hiking trails in the world and was a highly of our Southern California road trip.
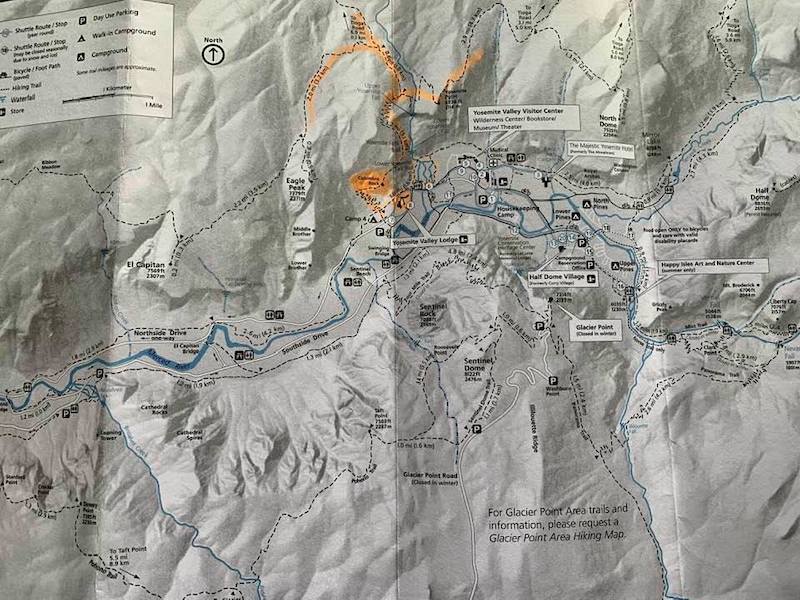
Yosemite National Park Map
Before doing the Mist Trail hike, it’s recommended to print out a map of Yosemite National Park. You can click here to do that.
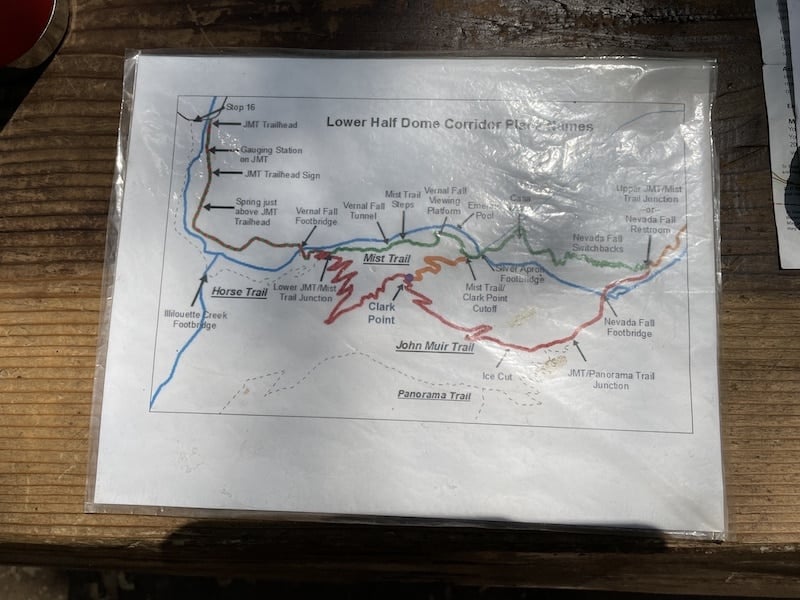
You can also get a map for the Mist Trail to Vernal and Nevada Falls hike specifically here (Google Map version).
Note: You’ll get a paper Yosemite Trail Map when entering the park (shown below) and there are maps posted everywhere for you to easily take a photo of with your phone.
And here is also a map of the Mist Trail that you’ll see along the hike, specifically at the Vernal Falls Footbridge:
Mist Trail To Nevada Falls: Logistics
Difficulty Level: Strenuous.
Trailhead: Happy Isles Nature Center, where you’ll cross the Happy Isles Bridge to begin the hike. There is a parking lot about a half mile from the trailhead, though if that’s full Curry Village is also within a mile walk. Here is a Google Map to help. You can also take the shuttle to shuttle stop #16.
Trail Length: 5 miles round-trip; about 5-6 hours.
Elevation Gain: A steep uphill 1,900-foot elevation gain.
Trail Type: Out and back or you can make it a loop by going back down the John Muir Trail, which adds about 1.5 miles. The latter is highly recommended, both due to the change in scenery as well as the fact that it’s easier on your knees.
Nearest Park Entrance: South Entrance/Mariposa Grove.
Restrooms: There are restrooms at the parking lot, the trailhead at Happy Isles Nature Center, and the Vernal Falls Bridge, where you can also refill your water bottles.
Best Time To Go: Spring! This is when you’ll truly experience the “mist” of the Mist Trail as you become soaked from the spray of the waterfalls.
Good for solo travelers? As this trail is well-populated, I think it’s a great option for those hiking solo who are worried about hiking alone safety.
Trail Highlights:
- Gorgeous waterfall views for most of the hike
- Standing atop Vernal Falls from 3,327 feet
- Standing atop Nevada Falls from 5,971 feet
- The views looking back toward Nevada Falls, Half Dome, and Liberty Cap from the John Muir Trail
Interestingly, neither Vernal or Nevada Falls can be viewed from the Yosemite Valley Floor (though they can be viewed from Glacier Point). This makes the Mist Trail hike even more special.
Vernal And Nevada Falls Via The Mist Trail [Video]
Below you’ll find a detailed written account with photos of the Mist Trail hike; however, those who want a first-hand perspective can check out my trip video here:
After watching, keep reading for more information about hiking the Nevada Falls Loop.
How To Hike Vernal And Nevada Falls In Yosemite National Park (Mist Trail)
I absolutely love a scenic waterfall hike — especially when said hike includes multiple waterfalls and incredible mountain views.
And so, despite a rating of “strenuous” in the national park’s hiking guide, my husband Andy and I decide to hike the Yosemite Mist Trail, named after how wet you get on the hike — at least in spring and early summer when the waterfalls are at their strongest.
We park in the Curry Village and make our way to the trailhead near Happy Isles Nature Center.
The trail starts off as a paved path, immediately offering beautiful views of the surrounding Sierra Nevadas and granite peaks through the trees.
It feels easy at first, and I find myself wondering why this trail is rated as strenuous — though that thought quickly disappears as the easy paved path turns into an uphill ascent.
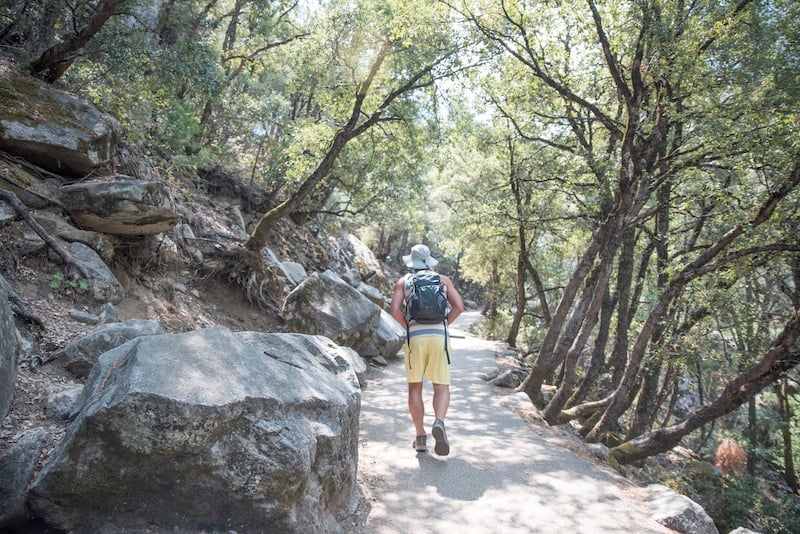
It’s gradual at first, becoming steeper and steeper as time passes. Pretty soon, my calves are burning, then absolutely screaming.
Despite the pain, I’m amazed by the beauty around me.
On the right I’m immersed in greenery.
Then on the left are huge walls of boulders, pebbles, and sand — collectively called “talus” — which have broken off from the cliffs above.
Interestingly, as the talus collects water it forms a moist and cool shelter as well as a foraging place for animals like spotted bats, black bear, and ringtails. While we don’t spot any of these animals during our hike, I can’t help but imagine how incredible it would be to see this in person.
Luckily, we hardly bored on this trail. In fact, it doesn’t take long for our first unobstructed Sierra Nevada view to appear.
Hey, it’s a lot easier to propel your body forward when you’re staring at mountains and valleys.
After about a mile, we cross a wooden footbridge and reach the first and only water refilling station on the Mist Trail.
Hiking To Vernal Falls
It’s here that we start seeing loads of California ground squirrels and blue Steller’s jays — as well as a sign letting us know that there are 650 steps to the first waterfall, Vernal Falls, and even more if you’re also heading to the top of Nevada Falls, which we are.
!!!
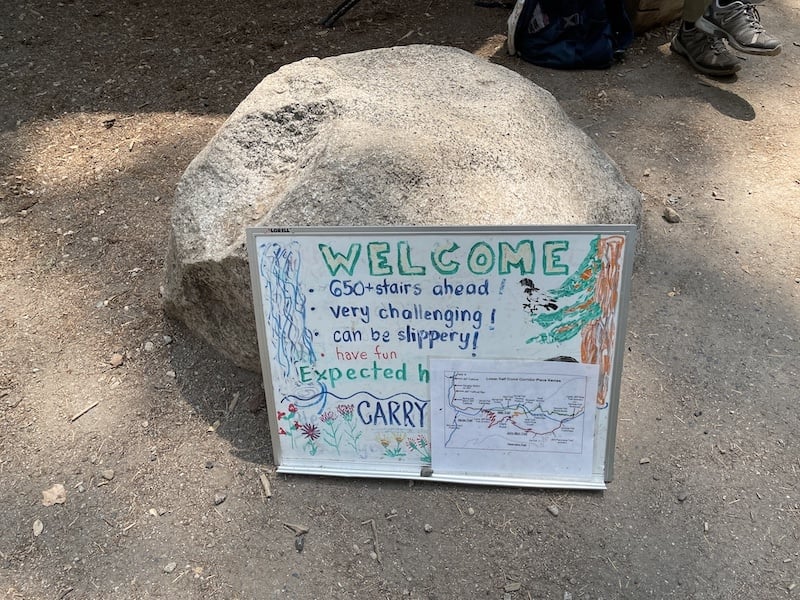
While filling my bottle, I give myself a silent pep talk and remind myself that I’ve done challenging hikes before like the Mohare Danda in Nepal and La Concepcion in Nicaragua; 650+ steps is nothing.
Of course, I know I’m lying to myself.
These steps are sometimes called “Nature’s Giant Staircase” — a name that only slightly clues you in to how grueling they are.
I try to take slow long breaths in and out of my nose, but end up panting like a dog with my tongue hanging out of my mouth.
But, I hear Vernal Falls — so close yet so far — and that keeps me going.
Not only that, but every once in a while there is a viewing platform offering stunning waterfall vistas. At each, I’m able to forget my pain momentarily; at least long enough to keep myself going.
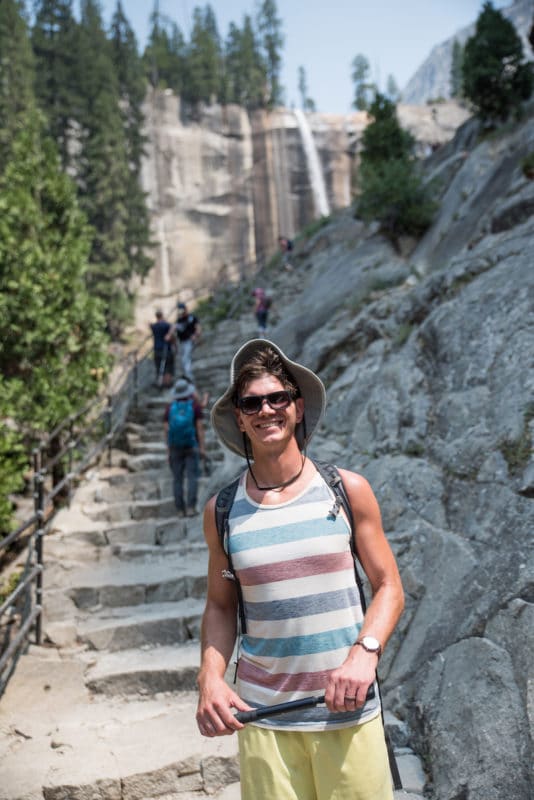
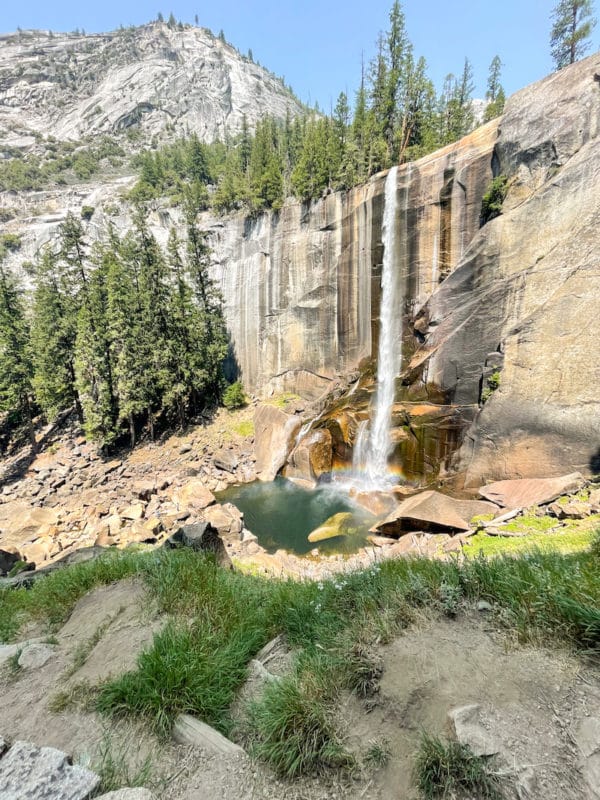
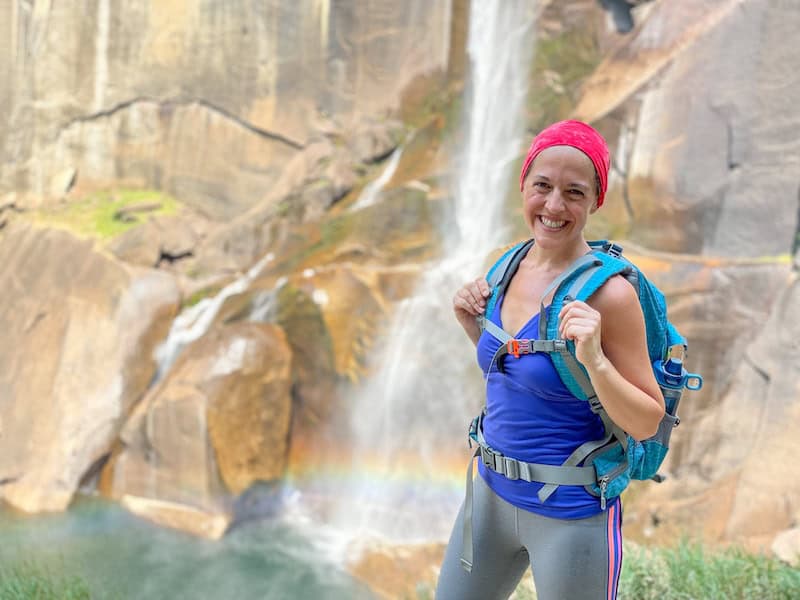
The steps climb higher, switching back and forth, until we finally reach the top of Vernal Falls, one of the most powerful falls in Yosemite National Park.
Fun fact:
Vernal Falls is actually incorrectly shown on a 1932 Philippines stamp instead of the local Pagsanjan Falls. I can’t imagine how that happened!
In terms of waterfall views, I actually think the viewing platforms up Nature’s Giant Staircase were more spectacular; however, from the top you can see over Yosemite Valley.
It’s gorgeous, especially as the Vernal Falls elevation is 3,327 feet with a waterfall height of 317 feet!
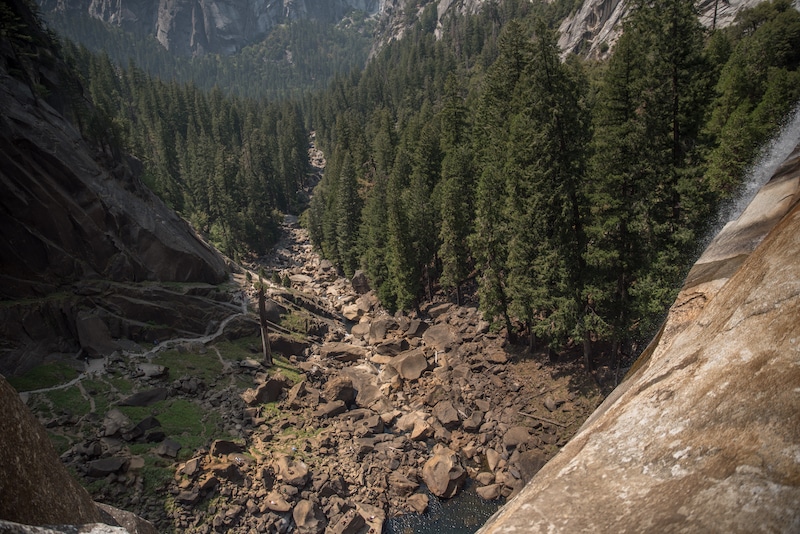
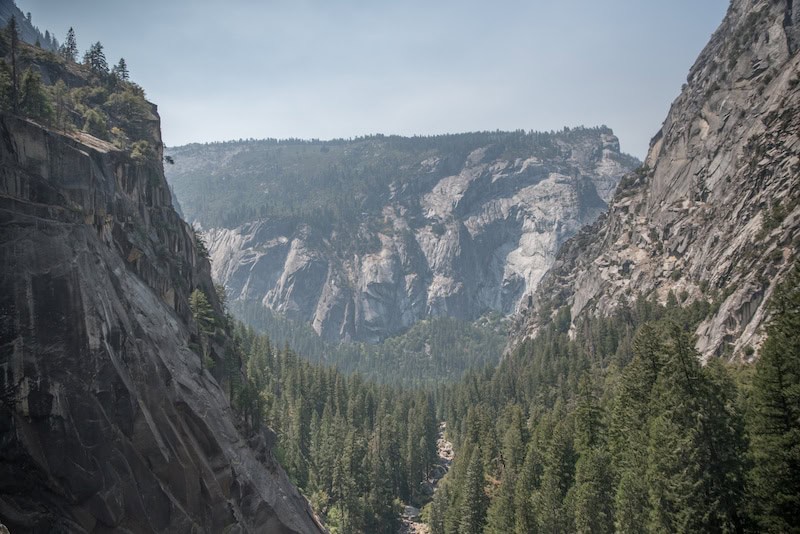
We stop for a quick snack and water, letting the natural beauty of Yosemite National Park wash over us, before pulling on our packs, taking a deep breath, and continuing on.
Hiking To Nevada Falls
Our next destination is the stunning Nevada Falls, one of the most popular attractions in Yosemite National Park.
There is a lot more uphill to go, though not before passing the tranquil Emerald Pool — a shallow lake with emerald waters.
A quick note on listening to the signs in Yosemite National Park:
They are there for a reason! Despite “no swimming” signs warning of the dangers of swimming here, many people do it. This has led to a number of people getting injured, and sometimes even killed. Don’t be one of those people. Stay safe.
After the natural pool, the vertical stone stairs begin again, through soon turn into hiking across rocky steps across a mountain face. It’s not scary, though it is still a workout.
Suddenly, Liberty Cap — the prominent granite peak that towers over the north side of Nevada Falls Yosemite — comes into view.
It’s a humbling sight, and my shutter clicks incessantly; one of many points while hiking the Mist Trail that my camera is out and hot.
Here are a few other photos from along this section of the hike:
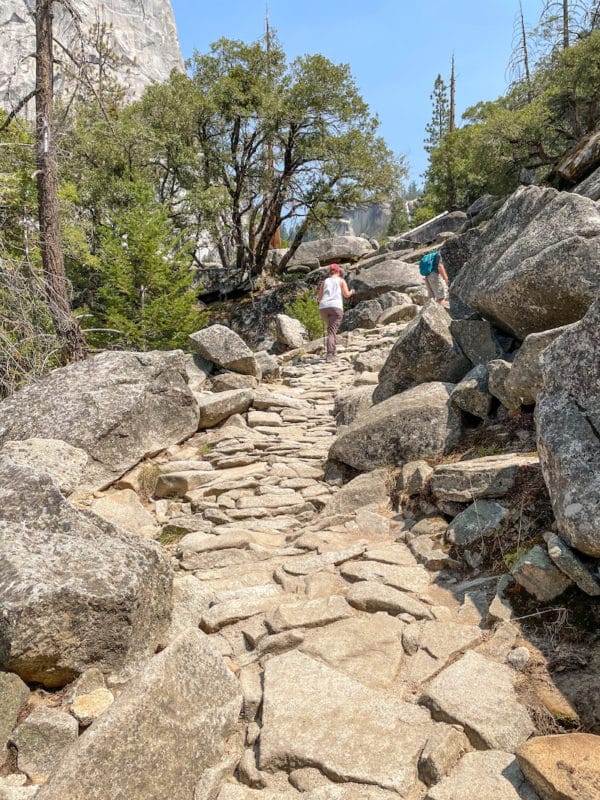
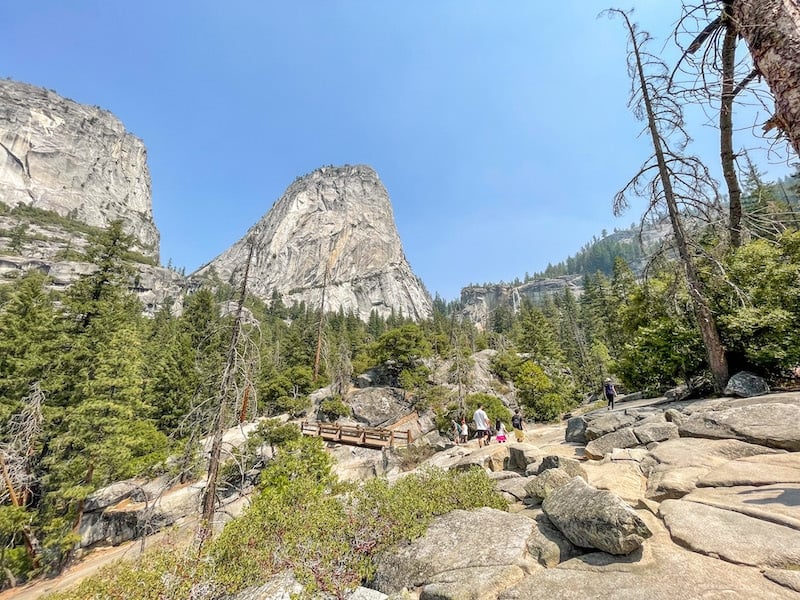
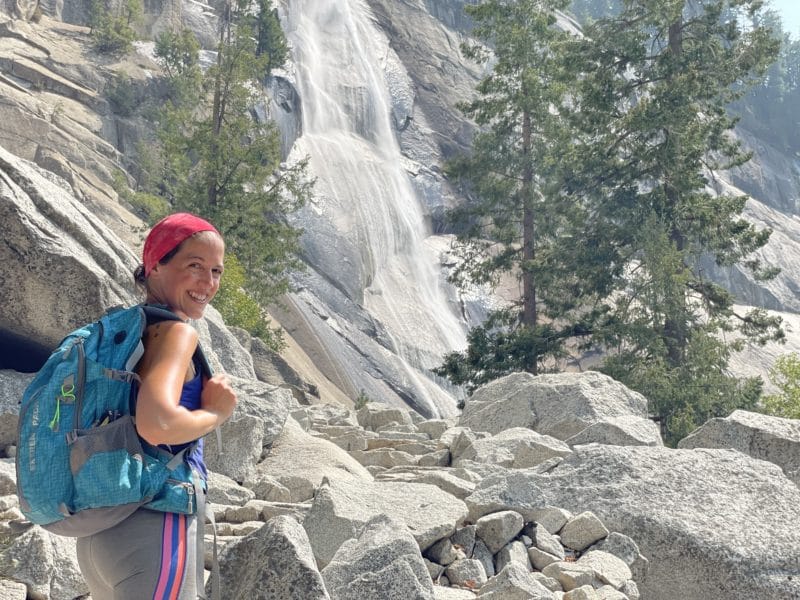
As Liberty Cap gets bigger into view, I know we can’t be far — though the phrase “so close but so far” has never felt more true than now.
Aside for a short flat woodland section through soft dirt, the trail is rocky steps heading sharply uphill, switching back and forth, higher and higher.
In total, it’s 3.4 extremely scenic albeit very challenging miles to the top of Nevada Falls.
And, as you can see in the following photos, it is worth every second:
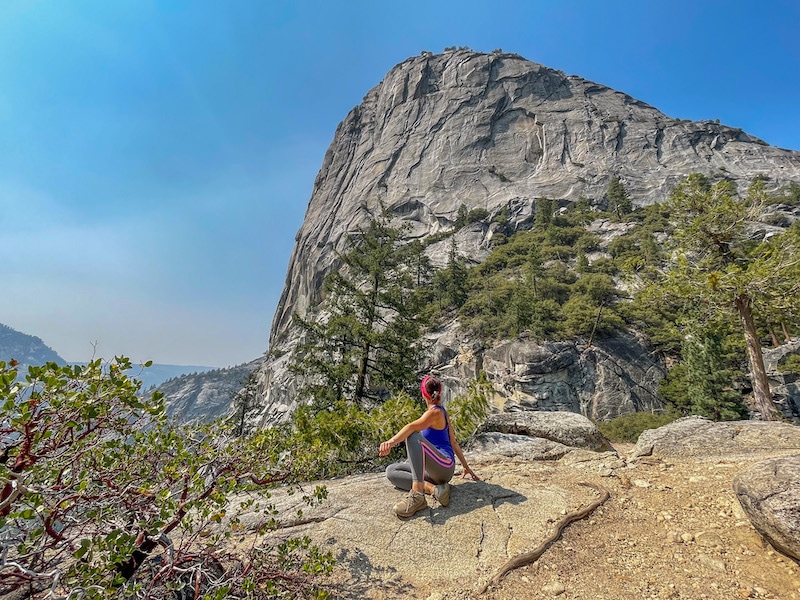
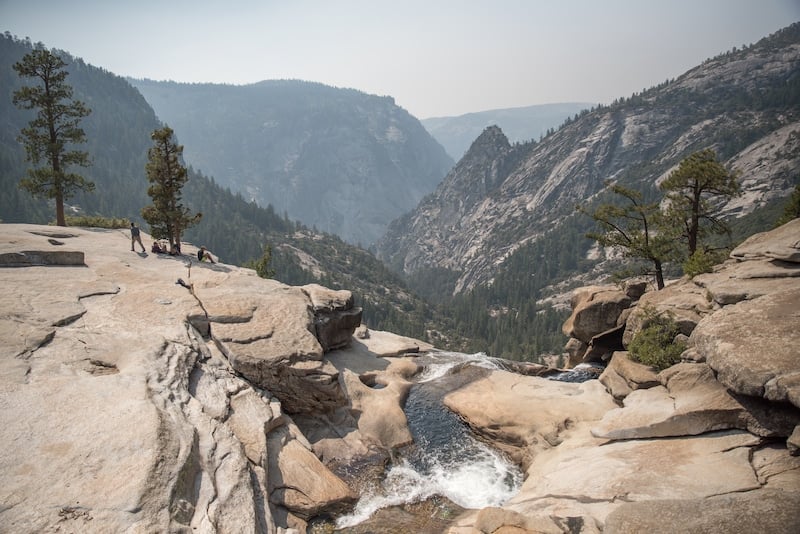
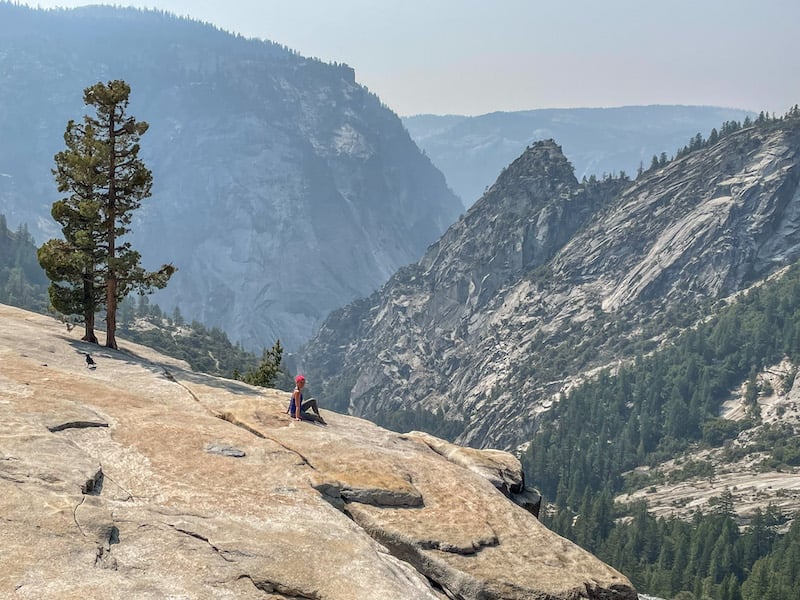
The Nevada Falls elevation is 5,971 feet with a waterfall height of 59 feet, making for some epic photos.
At the top, we cross the Merced River over a footbridge that straddles the fall, which provides us a closer vista.
This is also where we stop for lunch, enjoying up-close views of Liberty Cap, Nevada Falls, and black ravens gliding elegantly over Yosemite Valley.
I don’t think I’ve ever seen a sight so beautiful.
That is, until the way back.
Completing The Nevada Falls Loop Via The John Muir Trail
You see, while many hikers head back down the Mist Trail the way they came, you can opt to go down the John Muir Trail instead.
While it’s longer at four miles (vs about 2.5 if you went back the way you came), it’s way easier on your knees.
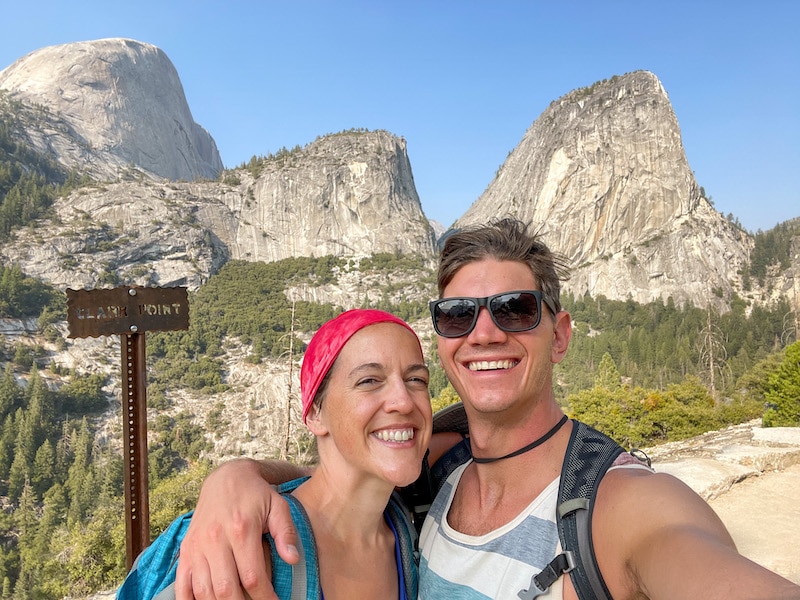
Plus, you get what is, in my opinion, the best view of the entire hike with Nevada Falls, Liberty Cap, and the back of Half Dome to one side, and trees sloping down into Yosemite Valley and being swallowed up by the curving lines of Yosemite’s many granite peaks and rock formations on the other.
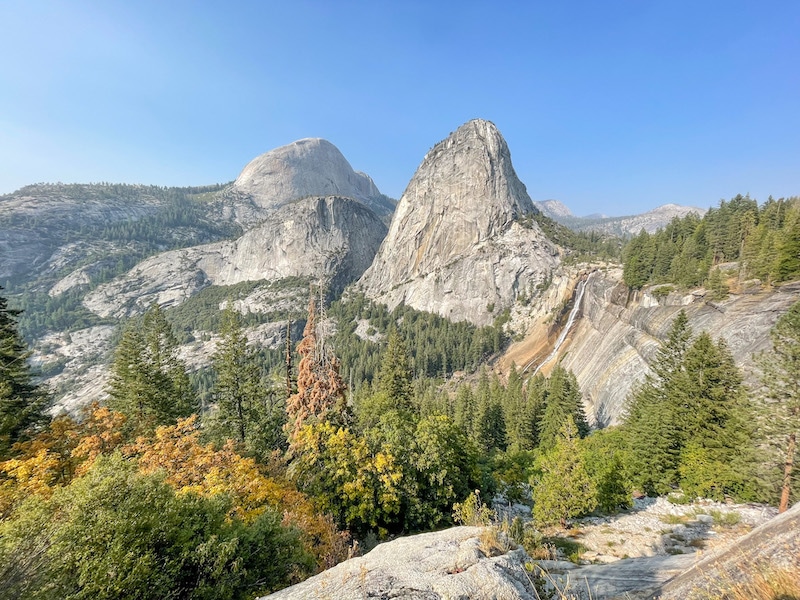
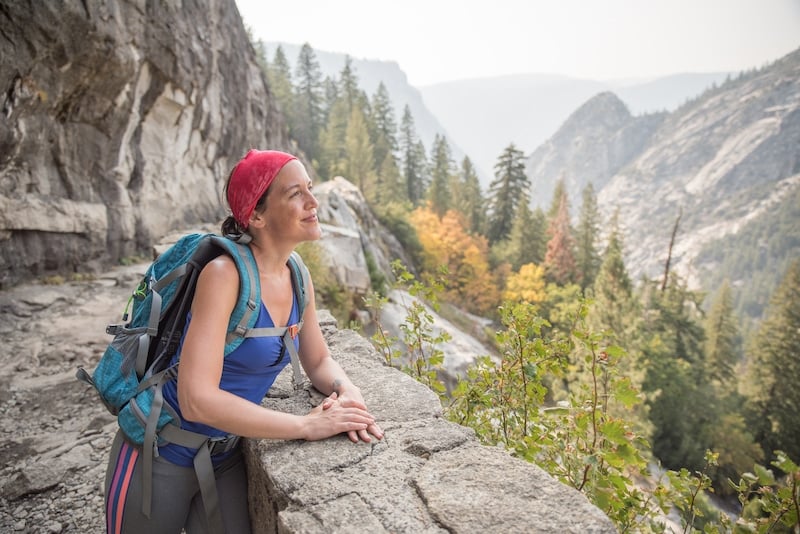
It’s also a very lovely and leisurely walk in the woods, especially after the Vernal and Nevada Falls Trail.
While sometimes you’re taking in epic views — like at Clark Point, another highlight of the way back — other times you’re immersed in forest watching birds fly from branch to branch and taking in the sweet scent of pine trees.
Overall, I’d say if you’re up for a challenge, the Mist Trail is absolutely worth the effort. It’s truly a Yosemite National Park hiking trail you won’t forget!
Pro tip:
Want to hike even further?
The John Muir Trail in Yosemite actually extends for 211 miles between Yosemite National Park — through Sequoia National Park and Kings Canyon National Park — all the way to Mount Whitney!
Yosemite National Park Hiking Tips
Hiking in Yosemite National Park? Here are a few important pieces of advice, whether you do the Mist Trail Yosemite hike or another trail. Honestly, most of these are true for all national parks.
-Know that you’re on Indigenous land. The Southern Sierra Miwuk Nation were the original inhabitants of the land that Yosemite National Park resides on, but were displaced and/or forced to relocate.
Along with educating yourself on the history and culture of this Indigenous tribe, consider making a donation to causes and charities that directly support them. Moreover, where possible hire Indigenous guides and purchase from Indigenous-owned businesses.
-Know which Yosemite National Park entrance is best. When booking your Yosemite National Park accommodation, do your research to make sure you’re staying near your desired entrance gate. The park is massive and it can take you hours to drive to a particular trailhead if you’re not staying in the right location.
-Keep wildlife wild. Do not feed, pet, or get too close to wildlife. If they become too used to humans they may become aggressive, and sadly may eventually need to be put down.
-Drive slowly. Make sure you’re going at or below the speed limit to avoid hitting animals. According to Yosemite National Park’s website, over 400 bears have been hit by cars since 1995. Don’t become a part of that statistic.
–Know the best time to visit Yosemite National Park. If possible, visit between May and September — though note that in summer the waterfalls may be dried up, so you might want to avoid July and August.
–Understand what to wear when you go hiking. Items like moisture-wicking clothing, sunglasses, and a hat can help keep you safe and comfortable.
-Stay on marked hiking trails. Going off-trail can cause trail erosion.
Other Not-To-Miss Yosemite National Park Hikes
If you’re looking to explore some of the other incredible hikes beyond the Nevada Falls Loop, don’t miss:
Easy Yosemite Hikes
Lower Yosemite Fall
Mirror Lake
Wawona Meadow Loop
Soda Springs/Parsons Lodge
John Muir Trail through Lyell Canyon
Moderate Yosemite Hikes
Sentinel Dome Trail to Glacier Point
Vernal Fall Footbridge
Valley Floor Loop
Swining Bridge Loop
Taft Point
Elizabeth Lake
Lukens Lake
Difficult Yosemite Hikes
Top of Upper Yosemite Fall
Four Mile Trail To Glacier Point
Lembert Dome
North Dome
Yosemite Point
Hotels Near Yosemite National Park
Click here for a full list of hotels near Yosemite!
Prefer self-contained stays?
Click here to view unique local rentals!
You can also peruse the map below. It’s set to El Portal, one of the closest towns to Yosemite National Park, but you can easily change the destination based on where you’d like to stay.
Yosemite Park Tours
Looking to explore Yosemite and its surroundings with a guide? Here are a few highly-rated experiences:
- Full-Day Small Group Yosemite & Glacier Point Tour Including Hotel Pickup from Oakhurst
- Private Guided Hiking Tour in Yosemite
- Yosemite Valley Private Winter Hiking Tour
- Private Tuolumne Meadows Hiking Tour from Wawona
- One Day In Yosemite Private Tour: Yosemite Valley, Glacier Point & Giant Sequoias
Click here for a full list of Yosemite National Park tours.
Renting A Car For Yosemite National Park
Yosemite National Park is huge, and you’ll definitely want a car to explore the many trails and sites.
If you need to rent a car, I highly recommend using Discover Cars to quickly compare your rental options.
Their comparison tool does the homework for you, so there’s no need to have up 10+ tabs trying to figure out which company is the most affordable. Actually, you can save up to 70% using their tool!
Yosemite National Park Travel Insurance
When visiting Yosemite — or anywhere else in the world — it’s wise to get travel insurance.
One of the best travel medical insurance for travelers is SafetyWing as they’ve got a large network and offer both short-term and long-term coverage — including coverage if you’re traveling for months as well as limited coverage in your home country).
Additionally, SafetyWing is budget-friendly and offers $250,000 worth of coverage with just one low overall deductible of $250.
Click here to price out travel insurance for your trip in just a few clicks.
Other Top California Hikes
Looking to explore other California hiking trails? A few not-to-miss trails include:
1, 2, & 3 Day Itinerary For Yosemite National Park
Lost Horse Mine in Joshua Tree National Park
Hidden Valley Trail in Joshua Tree National Park
Ryan Mountain in Joshua Tree National Park
Mount Whitney in the Sierra Nevadas
The Lakes Trail in Sequoia National Park
James Irvine Trail to Fern Canyon in Prairie Creek Redwoods State Park
Sentinel Dome to Glacier Point in Yosemite National Park
Columbia Rock Trail in Yosemite National Park
One Day In Sequoia National Park: The Perfect Itinerary
Have you ever hiked Vernal and Nevada Falls in Yosemite National Park?
Enjoyed this guide to the Mist Trail Yosemite hike? Pin it for later!


Hi, I’m Jessie on a journey!
I'm a conscious solo traveler on a mission to take you beyond the guidebook to inspire you to live your best life through travel. Come join me!
Want to live your best life through travel?
Subscribe for FREE access to my library of fun blogging worksheets and learn how to get paid to travel more!
Turn Your Travel Blog Into A Profitable Business
Subscribe to my email list to snag instant access to my library of workbooks, checklists, tutorials and other resources to help you earn more money -- and have more fun -- blogging. Oh, and it's totally FREE! :) // Privacy Policy.